
How to Prevent Vinyl Wrap Bubbling (2026 Guide)
Posted by Editorial Team on Nov 21st 2026
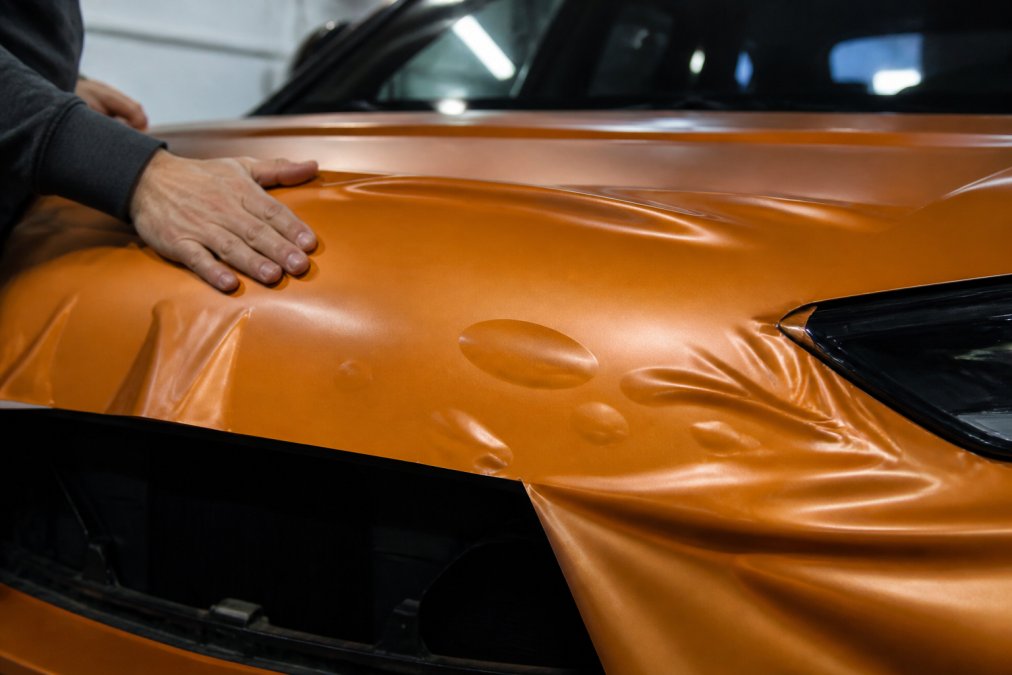
Table of Contents
- Why Vinyl Wrap Bubbling Happens
- The Best Surface Prep for Vinyl Wrapping
- Essential Vinyl Wrap Installation Tools
- Step-by-Step: How to Prevent Vinyl Wrap Bubbling During Application
- The Role of Post-Heating Vinyl Wrap
- How to Fix Vinyl Wrap Bubbles That Appear Later
- Preventative Maintenance for Long-Lasting Wraps
- Conclusion
- Frequently Asked Questions
Last Updated: September 7, 2026
Why Vinyl Wrap Bubbling Happens
Vinyl wrap bubbling is the formation of trapped air pockets between the adhesive layer and the substrate surface, creating visible bumps that compromise both aesthetics and longevity. Most bubbling issues trace back to installation errors rather than material defects.
The primary culprits are surface contamination, improper squeegee technique, and inadequate post-heating. When dust, oil, or silicone residue sits between the adhesive and the surface, it prevents proper bonding. Applying vinyl with too much stretch creates film tension that eventually pulls the adhesive loose.
The good news is that nearly every bubbling issue is preventable with the right preparation and technique.
The Best Surface Prep for Vinyl Wrapping
Surface preparation is the single most important factor in preventing vinyl wrap bubbling. A clean, contaminant-free substrate gives the adhesive a fighting chance to bond properly. But 'clean' means different things on different surfaces, each substrate type has its own contamination profile and requires a specific protocol.
Painted Surfaces: The Wax and Silicone Problem
Factory and aftermarket painted surfaces accumulate silicone-based waxes, polishes, and ceramic coatings that are invisible but deadly to adhesive bond. Silicone migrates into the clear coat and can re-emerge weeks after cleaning. The protocol is a three-step process: wash with a dedicated automotive degreaser, not dish soap; use a wax and grease remover to chemically dissolve silicone residues; then, after the panel is completely dry, do a final wipe with 99% isopropyl alcohol. Do not use 70% isopropyl alcohol; the higher water content leaves a film that interferes with adhesion.
Bare Metal: The Manufacturing Oil Challenge
Bare metal panels, common on custom builds and replacement body panels, arrive coated in a thin layer of rust-preventative oil. This oil is tenacious and requires a solvent-based cleaner, not just soap and water. Use a petroleum-based degreaser or a dedicated panel wipe designed for bare metal. After degreasing, scuff the surface lightly with a gray scotch-brite pad to create a mechanical tooth for the adhesive. This is a step most installers skip on bare metal, and it is the difference between a wrap that lasts and one that lifts at the edges within months. Finally, wipe with isopropyl alcohol and allow the panel to flash off completely before applying vinyl.
Plastic and ABS: The Static and Mold-Release Problem
Plastic substrates, common on bumpers, trim pieces, and aftermarket body kits, have two distinct contamination issues. Molded parts are often coated with a silicone-based mold-release agent that requires a solvent-based cleaner to remove. Plastic also generates static electricity, attracting dust and lint within minutes. Clean with a solvent-based wax and grease remover, then wipe with an antistatic solution or use an antistatic gun immediately before application. In dry environments, a humidifier keeping the air at 40-50% relative humidity reduces static buildup (the CDC).
The Final Flash-Off Period
Regardless of substrate type, allow the surface to completely dry after your last solvent wipe. Most solvents take 5 to 10 minutes to fully flash off at room temperature. Applying vinyl over solvent residue traps it under the adhesive, causing outgassing bubbles that appear days later. Wait the full flash-off period, and if working below 65°F, extend that wait to 15 minutes.
Essential Vinyl Wrap Installation Tools
Having the right tools on hand separates a clean install from a frustrating one. You don't need a massive investment, but you do need quality equipment that gives you control.
The non-negotiables include a high-quality squeegee with a felt edge, a heat gun with adjustable temperature settings, and a sharp utility knife with fresh blades. A felt-edged squeegee reduces friction and prevents scratching the vinyl surface. The heat gun is essential for conforming vinyl around curves and activating the adhesive during post-heating.
You'll also want isopropyl alcohol, lint-free microfiber cloths, and a spray bottle with a mild soap solution for wet applications. For large panels, consider a wrap glove or magnet to handle the vinyl without creasing it. A common mistake is using a cheap plastic squeegee that leaves marks or applies uneven pressure, which creates the perfect conditions for air entrapment.
Step-by-Step: How to Prevent Vinyl Wrap Bubbling During Application
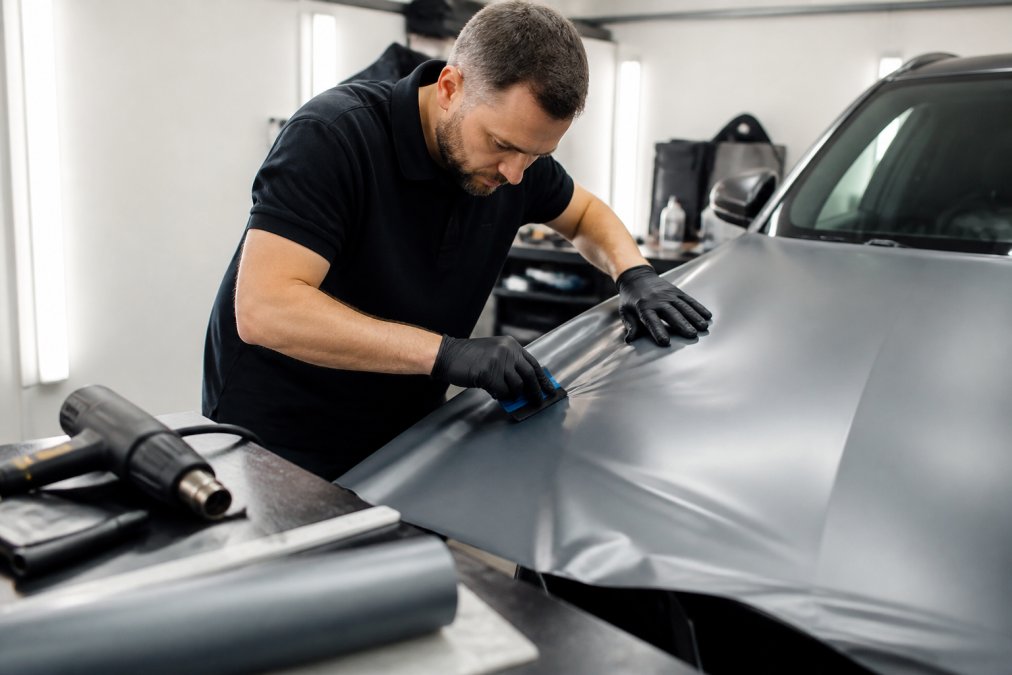
The installation process is where most bubbling problems start, and where careful technique prevents them. Follow these steps to minimize air entrapment.
Step 1: Work in a clean, temperature-controlled environment. Dust is the enemy of a bubble-free wrap. An ideal installation space is between 65°F and 75°F with low humidity. If you're working outside, choose a calm day and avoid direct sunlight, which accelerates adhesive tack and makes repositioning nearly impossible.
Step 2: Position the vinyl before removing the liner. Dry-fit the panel to identify curves and contours. This lets you plan relief cuts before the adhesive is exposed, reducing the need to stretch the film during application.
Step 3: Peel back the liner gradually and apply with light pressure. Start from the center of the panel and work outward. This pushes air toward the edges rather than trapping it in the middle.
Squeegee Technique and Pressure
Your squeegee technique directly determines whether air gets trapped or pushed out. Use overlapping strokes at a 45-degree angle, working from the center toward the edges. Apply firm, even pressure with the felt edge, and never use a back-and-forth motion, which can scratch the vinyl and create micro-bubbles.
For large flat panels, use a wider squeegee to cover more surface area efficiently. For curves and recessed areas, switch to a smaller squeegee or your thumb wrapped in a microfiber cloth for more control. The goal is to push air out ahead of the squeegee, not to press the vinyl down so hard that you stretch it.
Controlling Heat and Tack
Heat is a double-edged sword in vinyl wrapping. Applied correctly, it makes vinyl pliable and helps it conform to complex curves. Applied carelessly, it increases tack too quickly, causing the vinyl to bond before you've pushed out all the air.
When you encounter a curve or recessed area, apply heat with the heat gun in a sweeping motion, then immediately squeegee the warmed section. Work in small sections rather than heating a large area at once. The vinyl should feel warm but not hot to the touch. If you see the vinyl begin to shrink or distort, you've applied too much heat.
The Role of Post-Heating Vinyl Wrap
Post-heating is not just a final pass with a heat gun, it is the mechanical lock that prevents the vinyl's polymer memory from pulling the film away from the substrate. Every cast vinyl film is manufactured by extruding and stretching a PVC compound, storing internal stress in the polymer chains. Stretching the film over a compound curve adds more stress. Without a proper post-heat cycle, the film will slowly relax and try to return to its pre-stretched dimensions, a phenomenon known as vinyl memory. This relaxation is the primary cause of 'reappearing' bubbles and edge lifting that show up days or weeks after a clean install.
The Physics of Adhesive Activation
The adhesive used in most cast vinyl wraps is an acrylic pressure-sensitive adhesive (PSA). PSA bonds through a process called wet-out, where the adhesive flows into the microscopic pores of the substrate. This flow is temperature-dependent. At room temperature (around 70°F), wet-out happens slowly, which is why a wrap can look perfect immediately after installation but develop bubbles later. Post-heating accelerates wet-out, driving the adhesive into those pores and creating a mechanical bond that resists the pull of film memory.
Specific Temperature Ranges and Technique
Most premium cast vinyl manufacturers specify a post-heat activation temperature between 200°F and 250°F measured at the film surface, not the nozzle temperature. A heat gun set to 1,000°F at the nozzle can still deliver only 180°F to the film if you are moving too fast or holding the gun too far away. Use an infrared thermometer to check surface temperature as you work. Hold the gun 4 to 6 inches from the surface and move it in a slow, overlapping pattern. The film should feel hot but not become glossy or distort, that indicates you have exceeded the film's safe threshold, typically around 300°F.
The Two-Pass Method for Problem Areas
For flat panels, a single post-heat pass is sufficient. For areas where you stretched the film, door handles, side mirrors, bumper contours, use a two-pass method. The first pass heats the film to its activation temperature and allows the adhesive to flow. Immediately press the film down with a felt-edged squeegee. Wait 30 to 60 seconds and apply a second heat pass, which allows the film to relax further and locks it into its final position. Skipping the second pass on stretched areas is a common cause of bubbles that reappear in the same spot.
Why Post-Heating Prevents Reappearing Bubbles
Reappearing bubbles are almost always a symptom of adhesive failure, not air re-entrapment. When you smooth out a bubble without post-heating, you are pushing air out of a pocket where the adhesive never bonded, but the underlying cause, insufficient adhesive wet-out or excessive film tension, remains. Within days, the film memory pulls the adhesive away again. A proper post-heat cycle addresses both root causes: it drives the adhesive into the substrate pores and relieves the polymer stress. If a bubble reappears after correct post-heating, the cause is likely adhesive contamination, which no amount of heat will fix, that section must be lifted, cleaned, and replaced.
How to Fix Vinyl Wrap Bubbles That Appear Later
Even with careful installation, bubbles can sometimes appear after the fact. Catch them early before they grow or collect dirt.
For small bubbles, use the needle release technique: pierce the bubble with a fine needle at its edge, then squeegee the air out toward the puncture. This works best for bubbles smaller than a quarter. For larger bubbles, you may need to lift the vinyl edge and re-apply, though this risks stretching the film if you're not careful.
Reappearing bubbles are a different problem. If a bubble you've already fixed comes back, it usually indicates adhesive contamination or excessive film tension. In this case, the affected section may need to be removed and replaced entirely. Trying to patch a large contaminated area rarely produces a lasting fix.
Preventative Maintenance for Long-Lasting Wraps
A quality wrap installation should last for years, but only with proper care. Preventative maintenance separates a wrap that looks great for five years from one that starts lifting after twelve months.
Avoid pressure washing your wrapped vehicle for at least two weeks after installation. When you do wash it, use a gentle soap and soft mitt, avoiding harsh chemicals or abrasive pads. Parking in direct sunlight for extended periods can accelerate adhesive breakdown, so covered parking is ideal when available.
Regularly inspect the edges and corners of your wrap, especially after extreme weather or temperature changes. Catching a lifting edge early allows you to re-heat and re-press it before dirt gets underneath. As documented in 3M's vinyl wrap installation guidelines, proper edge sealing and routine inspection significantly extend the life of a wrap. Similarly, Avery Dennison's wrap care recommendations emphasize gentle washing techniques to preserve adhesive integrity over time.
Conclusion
Preventing vinyl wrap bubbling comes down to three things: rigorous surface preparation, disciplined installation technique, and thorough post-heating. Each step builds on the last, and skipping any of them invites the air pockets and wrinkles that ruin an otherwise clean install.
The tools and materials you choose matter as much as your technique. Working with professional-grade vinyl and reliable equipment reduces the variables that cause bubbling. At Sign Outlet Store, our team has helped Chicagoland sign professionals source the right wrap materials and installation tools since 1991, and our 10,000 sq. ft. showroom lets you see equipment in action before you buy. Whether you're refreshing your technique or outfitting a new shop, the right preparation and the right supplies make the difference between a wrap that lasts and one that bubbles up within weeks.
Frequently Asked Questions
Do air bubbles in vinyl wrap disappear after 2 days?
Small air bubbles can disappear if the vinyl has air release channels, but this is not guaranteed. Bubbles caused by contamination or improper tack will not go away on their own. Relying on this is risky; proper installation technique is the only reliable way to prevent vinyl wrap bubbling. If bubbles persist after 48 hours, you will need to address them.
Can heat help remove bubbles from vinyl wrap?
Yes, but only if the bubble is from stretch or memory effect, not contamination. Use a heat gun on a low setting to warm the film, then use a squeegee to push the air to the nearest edge. If the bubble is from dust or dirt, heat will not help; you must remove the film and reapply that section.
What is the best technique to apply vinyl without air bubbles?
The best technique combines proper surface prep and controlled application. Clean the substrate with isopropyl alcohol and a degreaser. Use a felt squeegee at a 45-degree angle with firm, overlapping strokes from the center outward. Work in a clean, temperature-controlled environment between 65-75°F to manage tack and prevent vinyl wrap bubbling.
Why does vinyl wrap bubble after it has been installed?
Late bubbling is usually from outgassing, where solvents in the adhesive evaporate, or from a lack of post-heating. Post-heating vinyl wrap sets the adhesive and relieves film tension, preventing the edges from lifting and bubbles from forming later. Skipping this critical step is a common cause of failure, especially on complex curves.
Bubbling is frustrating, but it's almost always preventable. Master your surface prep, refine your squeegee technique, and never skip post-heating. When you need professional-grade vinyl and reliable installation tools, Sign Outlet Store offers expert guidance and a hands-on showroom experience that online ordering can't match. Register today to explore our full catalog of wrap materials and equipment, and get the support you need for a flawless finish.